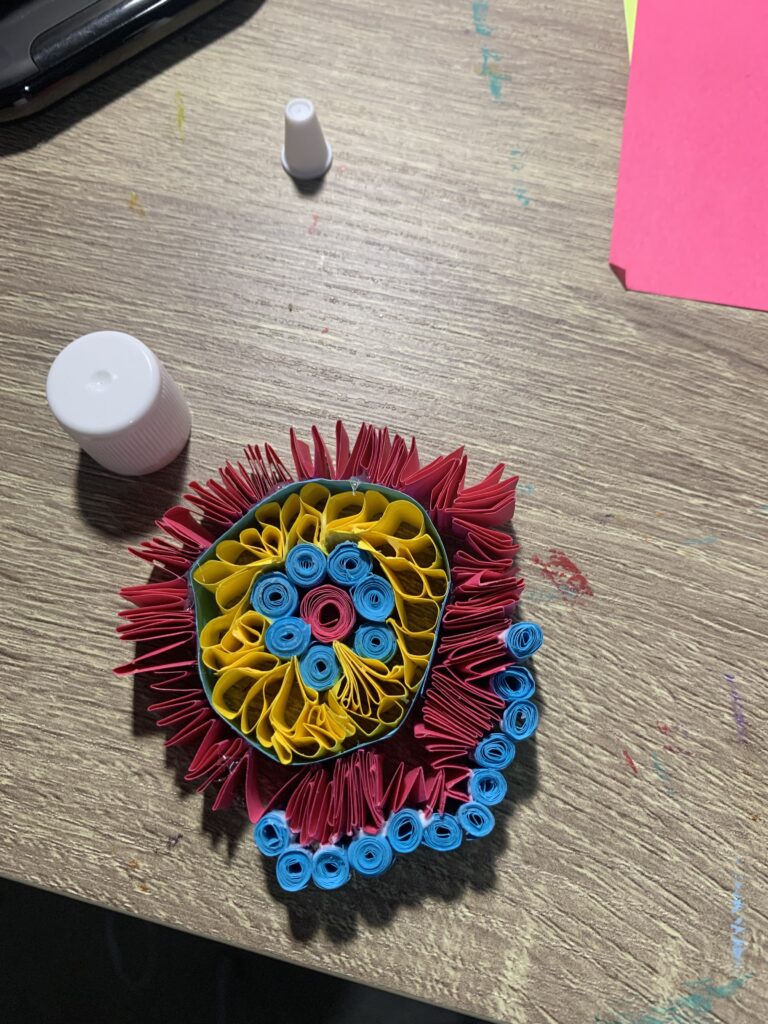
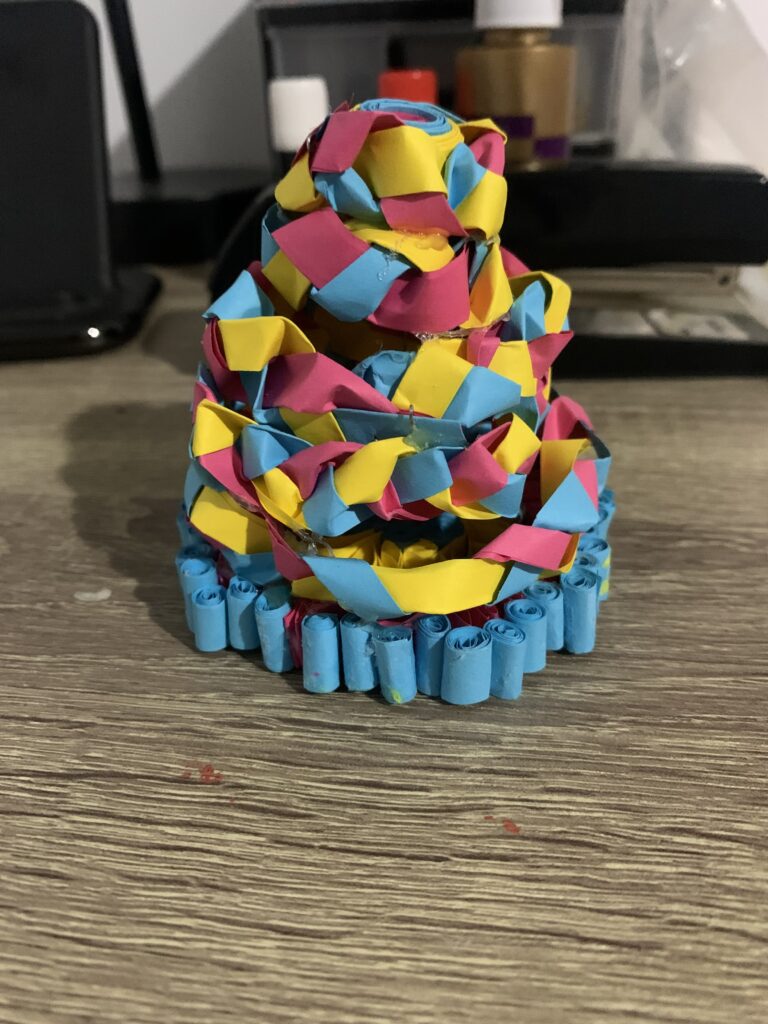
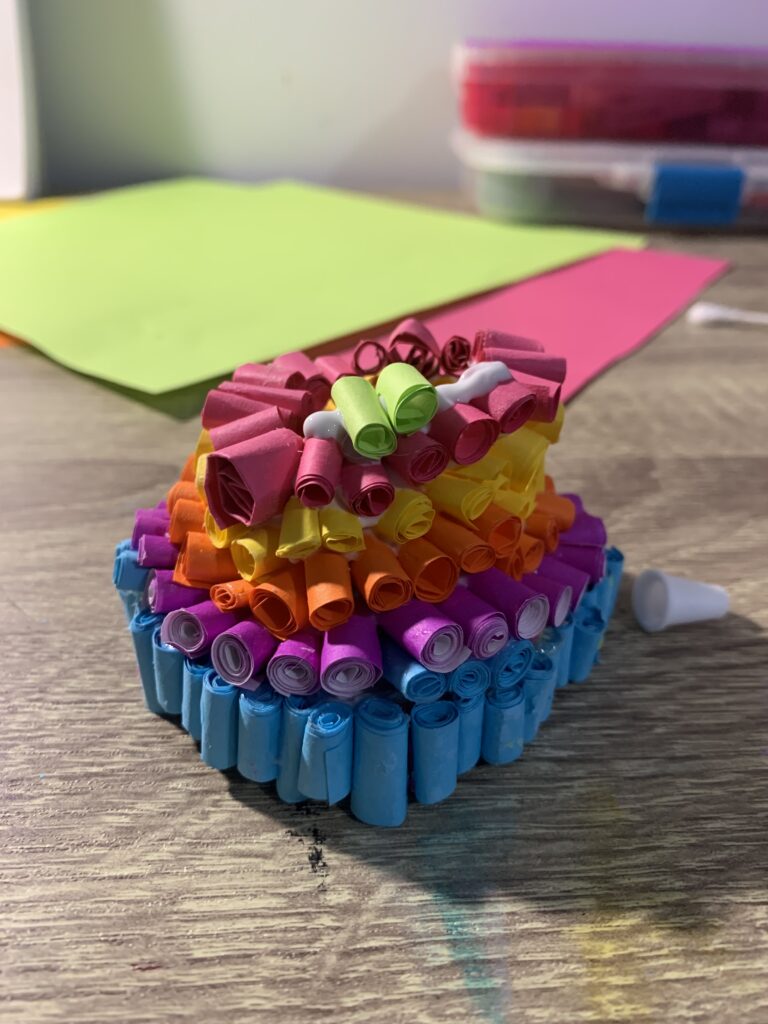
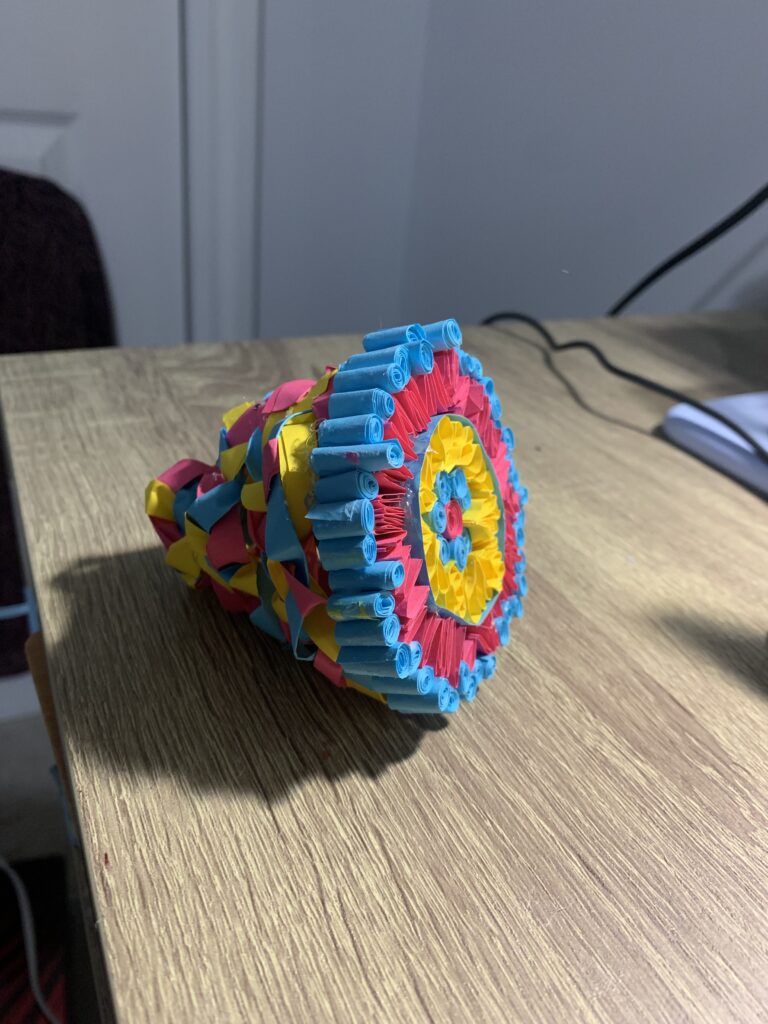
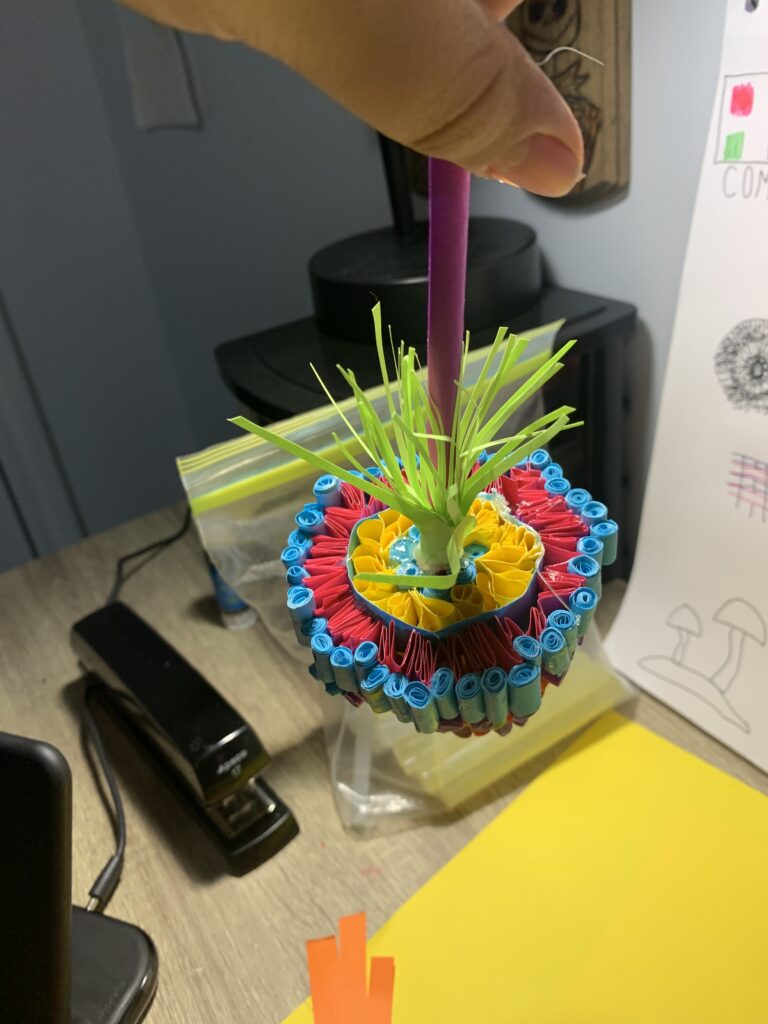
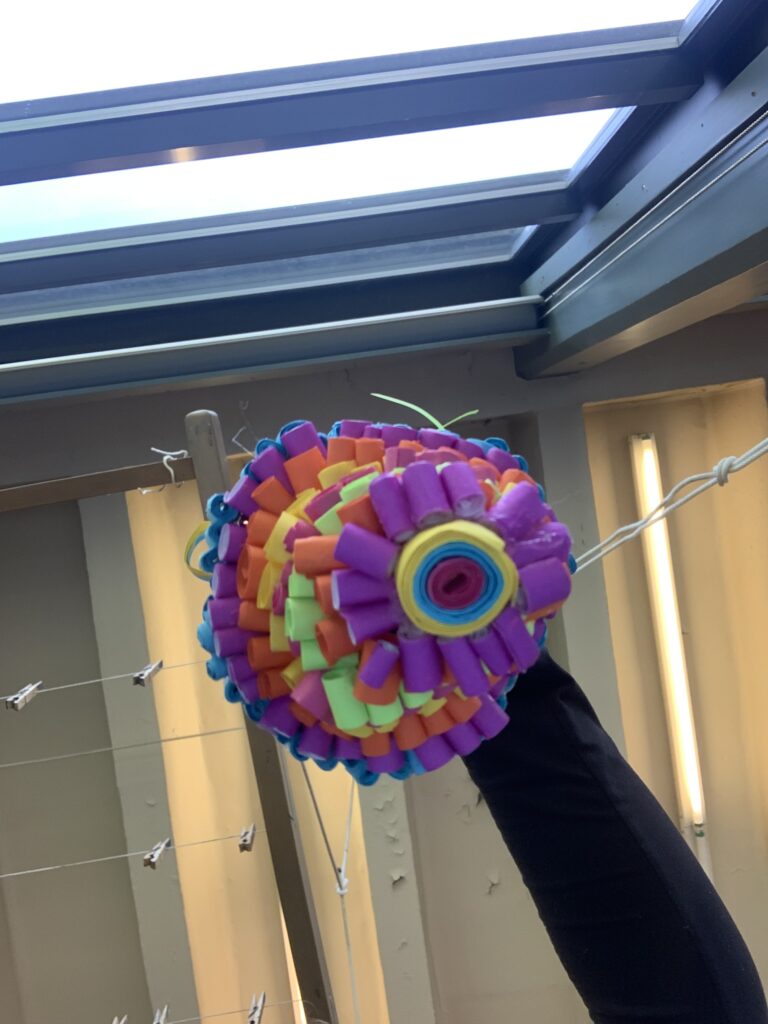
The First photo in this series was my initial vision for this piece. This was what I pictured in my head and what came the easiest to me. I was proud of the texture created in this initial circle and the different ways I represented the pieces. I used the pink part in the middle to represent the stem and the blue pieces to start some of the spores. The yellow and pink part then represented the gills of a mushroom. While the final blue perimeter represented the edge. The Second photo was my initial thought to create the mushroom cap. I liked the textured look and the use of space between the different layers but the colours seemed too dull. I wanted a trippier feeling or psychedelic look to the mushroom but it seemed too ‘primary colour triad’ rather than a psychedelic vibe. This is when I started the Third picture I used the rolling technique to get the texture and layered it in smaller rows going upward to create the dome. Including the secondary colour triad helped to create the psychedelic feeling and added more visual interest.
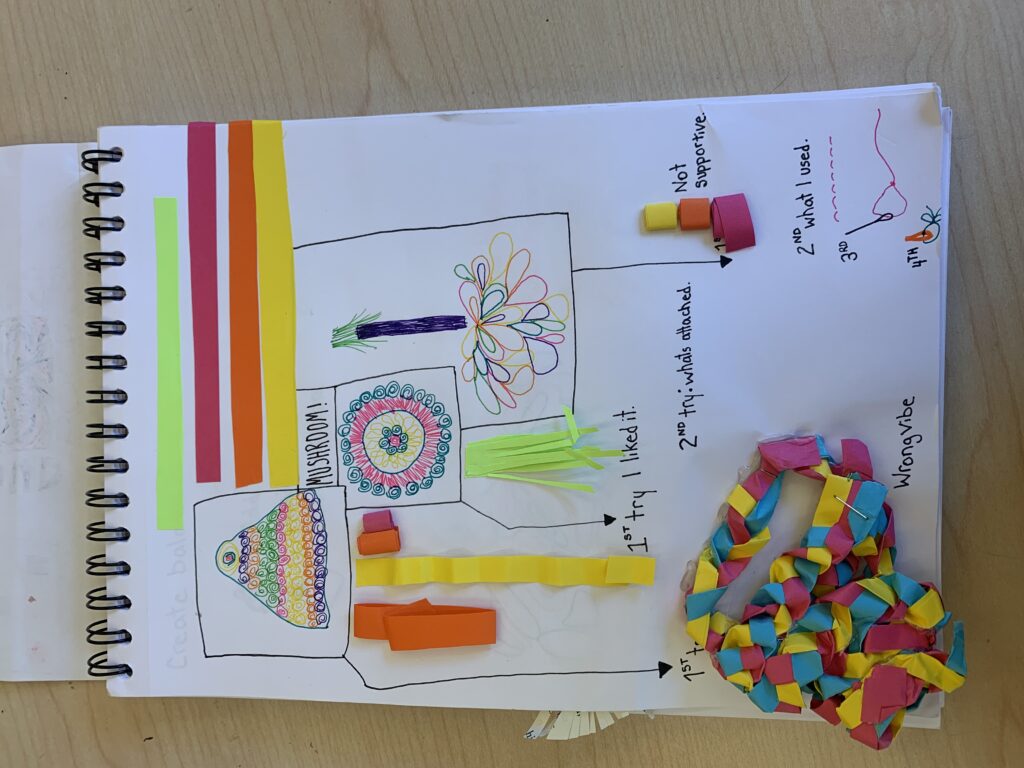
The First photo in this gallery was the beginning of my planning stages. I had a clear vibe that I wanted to create using bold colours, including two triads the primary colour triad but using a shade of red as well as a secondary colour triad. I wanted to use vivid colours to create the psychedelic feeling and mimic the extreme feelings and experiences one might have. I also planned on creating an organic shape like a mushroom to create the rounded shape for our project. The Second photo highlights the successes and failures throughout the building process. The first drawn image was how I created the dome shape in the end but the arrow showcases my earlier draft. The second drawn image is how I created the bottom of the mushroom. I went with my initial process however switched from glue stick to wet glue to hold all of the pieces together. The third drawn image is what I ended up using to create the stem and ground. I initially tried a segmented stem but it did not provide enough stability. I then used one rolled piece of paper and it held strong with use of hot glue. I then attached a few paper techniques I used such as strips, coils, rolls, cutting, and zigzags. The Third photo showcased my critique ” create more balance between the top and bottom” and my problem solving.
Above are the galleries showcasing both the process of planning and creating the paper sculpture I made.
Below showcases the final artwork in a gallery meant for focus and reflection. With added detail following.
The top three photos are still in progress. While the final five showcase the artwork in its final form minus the switch to a clear string.
My final work encompasses the psychedelic colour scheme using vibrancy and value to shock the viewer and create a visual experience. I use repetition of paper rolls to create fullness and cohesiveness throughout the piece. I use variety of different paper technique such as coils, rolling, folding, cutting, and creating circles. After my critiques I worked on creating balance between the mushroom cap and the ground and mimicked a similar shape to create an almost reflection as well as adding in mirrored fringe that reach towards each other to bring in a sense of cohesiveness. I believe the use of layering creates emphasis on each line as well as creating a sequential rhythm throughout the piece. This piece was made with hours worth of work, a clear vision, and trial and error. While I started with a clear idea and some aspects went to plan the rest required playfulness and the ability to scrap an idea and start all over again. I am proud of the sculpture I created and feel I was able to create a representational piece while also using colour and orientation to represent that psychedelic experience.